

One of Engati’s key philosophies is that we want to help you do more, with ease. We want to help you create the most amazing experiences, without making you jump across systems and platforms.
That’s why we’ve ensured that Engati plays well with all your systems. We’ve ensured that you get to extend your support and marketing software with Engati’s intelligent customer engagement systems using powerful cloud-based integrations.
Ticketing & CRM Integrations
By integrating Engati with Salesforce, you’re making it easier for your bot and your agents to record leads and handle tickets. You can directly integrate Engati with Salesforce if you are using Salesforce’s Enterprise, Unlimited, Developer, or Performance editions.
Go to the ‘Integrations’ tab in the Engati portal and select Salesforce. Click on ‘Add Account’ to log in and grant access to your Salesforce account.
Now, navigate to ‘Paths’ under the ‘Build tab in the Engati portal and add a Salesforce node. After choosing an account, you’ll be able to select an action to be performed on your Salesforce account in that flow.

Once you select the action it populates rows that are required to complete the actions. You will need to assign different attributes for each row. After doing that, just save the node and your Salesforce integration is ready to be used.
Integrating Engati with Zendesk allows you to create tickets, retrieve ticket details, and update tickets directly from your bot. The direct integration is available with Zendesk’s Essential, Team, Professional, Enterprise, and Elite plans.
From Engati’s integrations tab, go to Zendesk and click on ‘Add Account’ to grant access to your Zendesk account. You’ll need to enter the email id associated with your Zendesk account, along with your API key and Zendesk Subdomain Name.
To get your API key, you’ll need to go to the ‘Admin settings’ section in your Zendesk account. Select ‘Channels’ and then click on ‘API’.
Click the toggle to enable API authentication, if it isn’t already enabled.

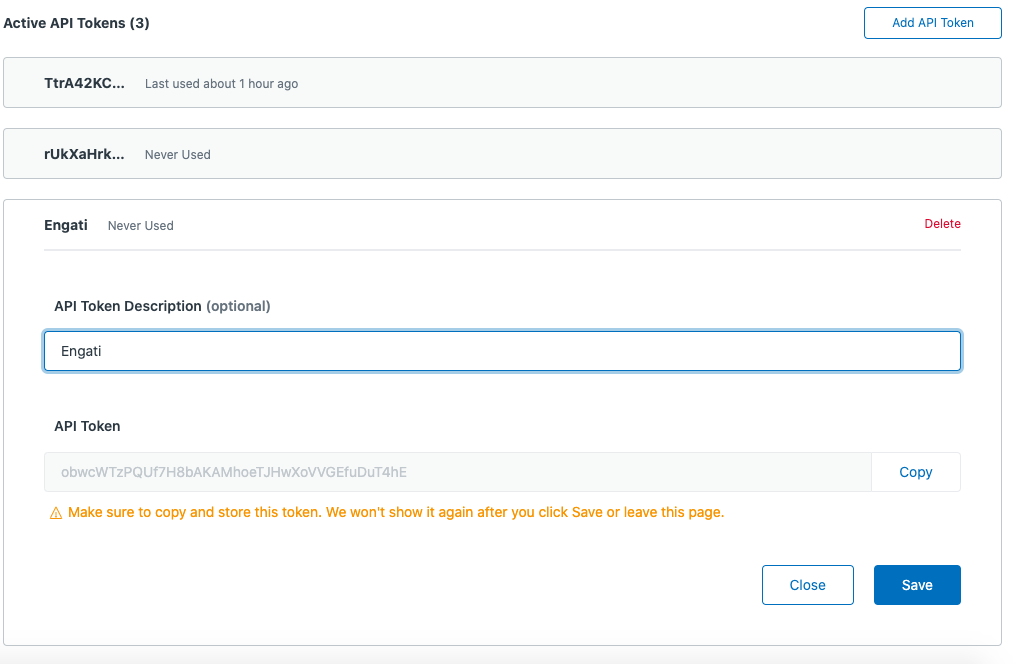
Click on the ‘Add API Token’ button, name the new token, and copy the API key displayed before you hit ‘Save’.
Your Subdomain Name is the name of the account that has been you use to access Zendesk – it will be in the format xyz.zendesk.com, where ‘xyz’ is the subdomain name.
Now, go to ‘Paths’ under the ‘Build’ section in Engati, add a Zendesk node and select the account. It’s now time to choose an action.
The actions you have available in the Zendesk integration are: Create Ticket, Get Ticket, and Update Ticket.
After doing that, all you need to do is assign attributes to the rows, and hit ‘Save’.
You can use the Freshdesk integration to create tickets, get ticket details, and update existing tickets directly from your Engati chatbot.
You can directly integrate Freshdesk with Engati if you use Freshdesk’s Blossom, Garden, Estate, or Forest plans.
Locate the Freshdesk option under Engati’s Integrations tab and click on ‘Add Account. After clicking ‘Authorize’, enter your API key and Freshdesk Subdomain Name.
To get your API key, you’ll need to go to the ‘Profile settings’ section in Freshdesk. Now just copy the API key in the ‘Your API Key’ section.
The subdomain name is the name of the account that has been you use to access Freshdesk. Once again, it will be in the format xyz.freshdesk.com, here ‘xyz’ is the subdomain name.
After entering your API key and subdomain name, go to Paths under the ‘Build’ section and add a Freshdesk node. Select Create Ticket, Get Ticket or Update Ticket as the action for that flow and assign different attributes for each row.
Google Sheets Integration
Integrating Engati with Google Sheets will help you simplify lead generation and storage. It will empower your bot to pull data from the sheets, add new data, and modify existing data without human intervention.
To set it up, you will need to go to the Integrations tab, click on Google Sheets, add your Google account and authorize it.
In the Paths section, add a Google Sheets node. Select your account and choose an action that you’d like the node to perform.
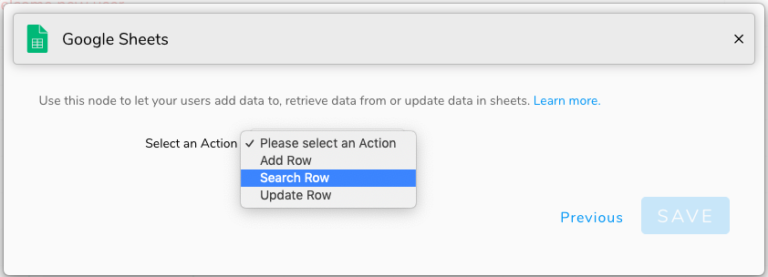
Choose the ‘Add Row’ action if you want your lead details to be automatically added to your spreadsheet. ‘Update Row’ will help you modify information. If your users need to access information from your spreadsheet, your bot can retrieve that information automatically with the ‘Search Row’ action.
Google Calendar Integration
The Google Calendar integration is perfect for scheduling appointments, booking demo calls and time slots for activities, and scheduling team meetings.
From Engati’s Integrations tab, select Google Calendar. Now add and authorize your Google account.
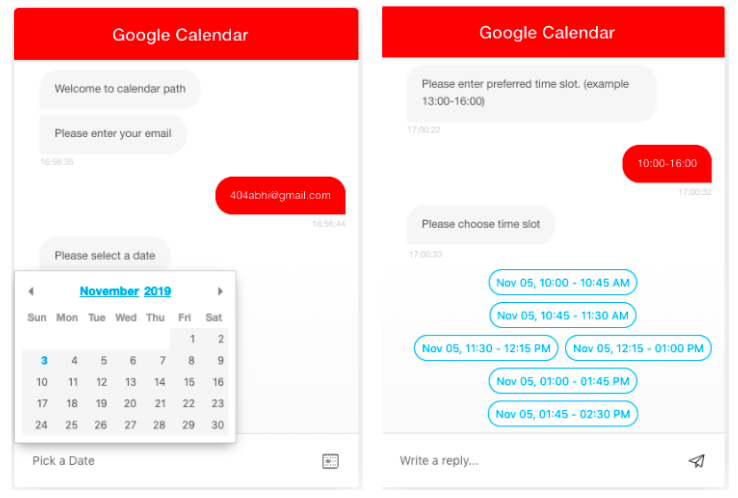
Now, from the Build section, go to the Path you are working on and add a Google Calendar node. Now, you can use this integration to pull available time slots based on the user’s preferred dates.
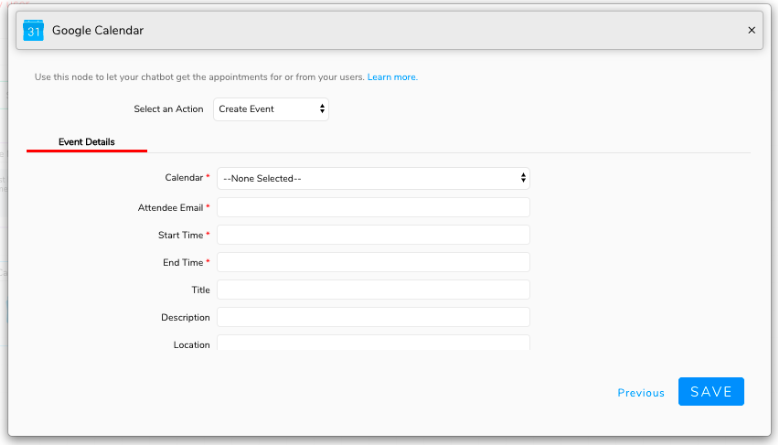
You can also use it to create a calendar event, which will trigger an email to all event attendees.
Zapier Integrations
Zapier provides API integrations for a variety of cloud services. With a Zapier account, you can integrate Engati with any of those cloud services.
Zapier classifies their functionality like this:
All you need in order to use the Zapier integrations with Engati is a Zapier account and an account for the app that you want to integrate with.
From the Paths section, add a Zapier node. Click the link in the pop-up and add the Engati app in Zapier.

You can get the API key and other information while setting up the Zapier node in Engati.
Now, you’ll need to create a Zap in Zapier. Select the Engati application and click on ‘New Zap Event’ as the trigger.
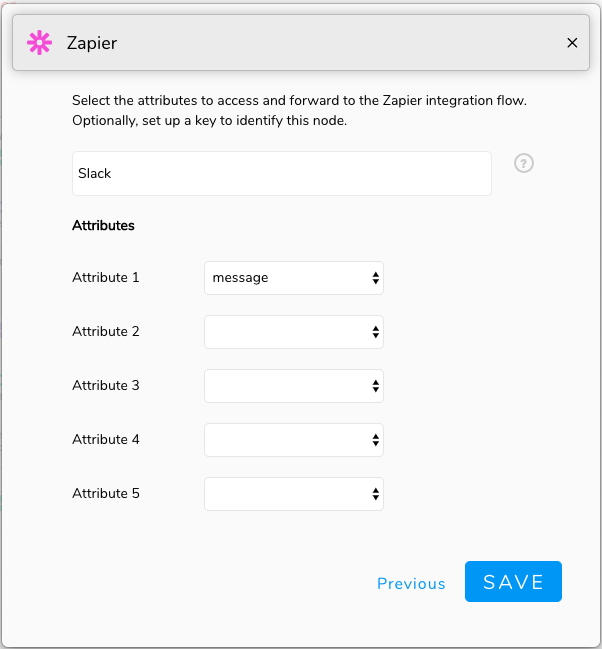
Now, add a new step and choose the app that you want to integrate, eg. Slack.
Choose the action that you want the node to perform.

You’ll now have to connect your Slack account and start setting up your action. After that, save it, test it and then turn your Zap on. Go back to the Engati portal, hit next on the Zapier node, and add an event key to differentiate it from other Zapier nodes that you set up.
JSON API Integrations
Engati platform allows you to integrate with any system using REST APIs in the JSON (JavaScript Object Notation) data exchange format.
Engati allows you to make REST API calls using these methods:
After choosing the method you want to use, insert the required URL. You can now click on the Send button to know the response that you will get from the API call right over the Engati Interface.
If you’d like to learn more about the JSON API node, check this out.
The Webview node
The Webview node enables advanced use-cases like collecting payments and OAUTH that require a third-party web interface. It even has built-in configurations for Stripe payments and Google OAUTH to make your life easier.
In addition to that, it has custom setups available for use-cases that require the user to enter data on their website and convey the success back to Engati via a Callback.
The Send SMS node
This node will empower your chatbot to directly send SMS notifications to users. It even allows you to send SMS notifications to multiple mobile numbers simultaneously.
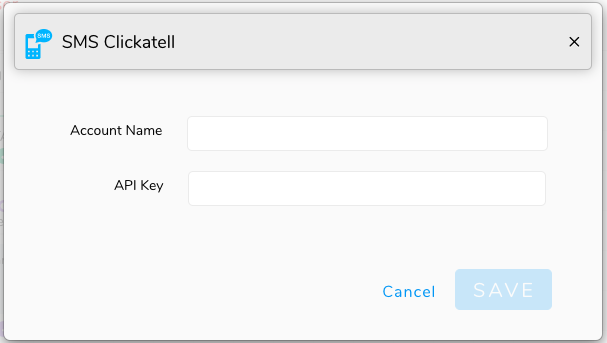
You can use the Send SMS node by integrating Engati with either Twilio or Clickatell.
You’ll need to enter your account name and API key to integrate with Clickatell.
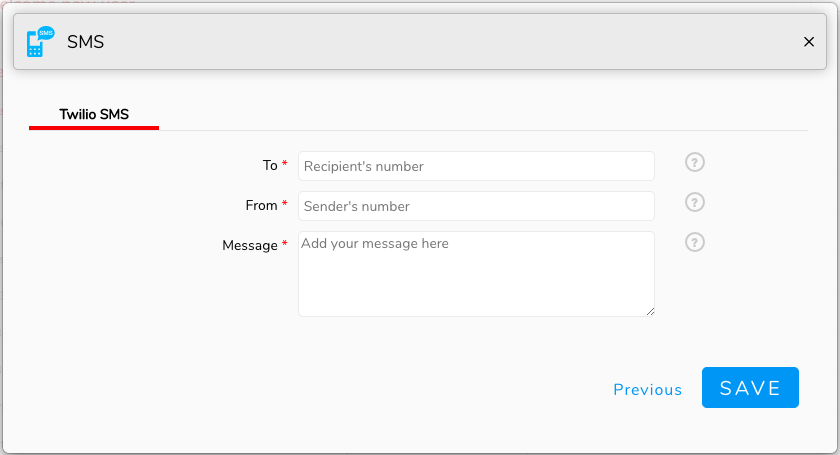
To integrate with Twilio, you’ll need to enter your account SID and auth token in addition to our account name.

While setting the node up, you’ll need to enter the recipient’s phone number. Twilio allows you to send messages to one recipient at a time. Clickatell allows you to send SMS messages to multiple recipients at the same time.
You’ll also need to enter the message that you would like to send.
Both the recipient’s phone number and the actual message can be pulled from attributes in the bot flow.
Want to experience these integrations yourself? Try Engati’s customer engagement systems yourself today!


